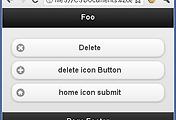
사용자 아이콘을 사용하기 위해, data-icon 값(ex, myapp-daeson)을 유일한 이름으로 설정하면 버튼 플러그인이 data-icon 값 앞에 ui-icon-을 붙여 class를 생성합니다. 사용자는 ui-icon-myapp-daeson class 속성을 타겟으로 css를 구현 가능하며, 일관성을 유지하기 위해 18x18 pixels와 PNG-8의 알파 투명도 규격으로 사용합니다.
<a href="index.html" data-role="button" data-icon="cheolwoo" > Test Custom icon </a>
html파일에 추가할 css 파일을 link 하고, 아래와 같이 배경색과 아이콘의 가로길이 사이즈를 설정해봅니다.
<link rel="stylesheet" href="customIcon.css" />
.ui-icon-cheolwoo {
background-color : red;
width : 2em;
}
테마 A의 아이콘 버튼
<a href="index.html" data-role="button" data-icon="arrow-l" data-iconpos="notext" data-theme="a" data-inline="true">My button</a>
테마 B의 아이콘 버튼
<a href="index.html" data-role="button" data-icon="arrow-l" data-iconpos="notext" data-theme="b" data-inline="true">My button</a>
테마 C의 아이콘 버튼
<a href="index.html" data-role="button" data-icon="arrow-l" data-iconpos="notext" data-theme="c" data-inline="true">My button</a>
위 세가지 아이콘 버튼을 가로로 정렬해 보겠습니다.
<div data-role="controlgroup" data-type="horizontal">
<a href="index.html" data-role="button" data-icon="arrow-l" data-iconpos="notext" data-theme="a" data-inline="true">My button</a>
<a href="index.html" data-role="button" data-icon="arrow-l" data-iconpos="notext" data-theme="b" data-inline="true">My button</a>
<a href="index.html" data-role="button" data-icon="arrow-l" data-iconpos="notext" data-theme="c" data-inline="true">My button</a>
</div>

화면에서 처럼 사용자가 원하는 스타일로 지정할 수 있습니다.
가로 정렬된 아이콘 버튼은 프레임웍에서 자동적으로 버튼들 사이의 연결부위를 자연스럽게 만들어 줍니다.
가장 처음의 css파일을 추가하여 지정한 경우에서 width 길이를 10em으로 늘려보시면 깜짝 놀랄 일이 벌어집니다.^^
'----- IT ----- > jQuery Moblie' 카테고리의 다른 글
| jQuery Mobile - Grouped Buttons (0) | 2011.05.18 |
|---|---|
| jQuery Mobile - Inline Buttons (0) | 2011.05.18 |
| jQuery Mobile - Button icons (0) | 2011.05.17 |
| jQuery Mobile - Button markup options (0) | 2011.05.16 |
| jQuery Mobile - Theming toolbars (0) | 2011.05.16 |


댓글